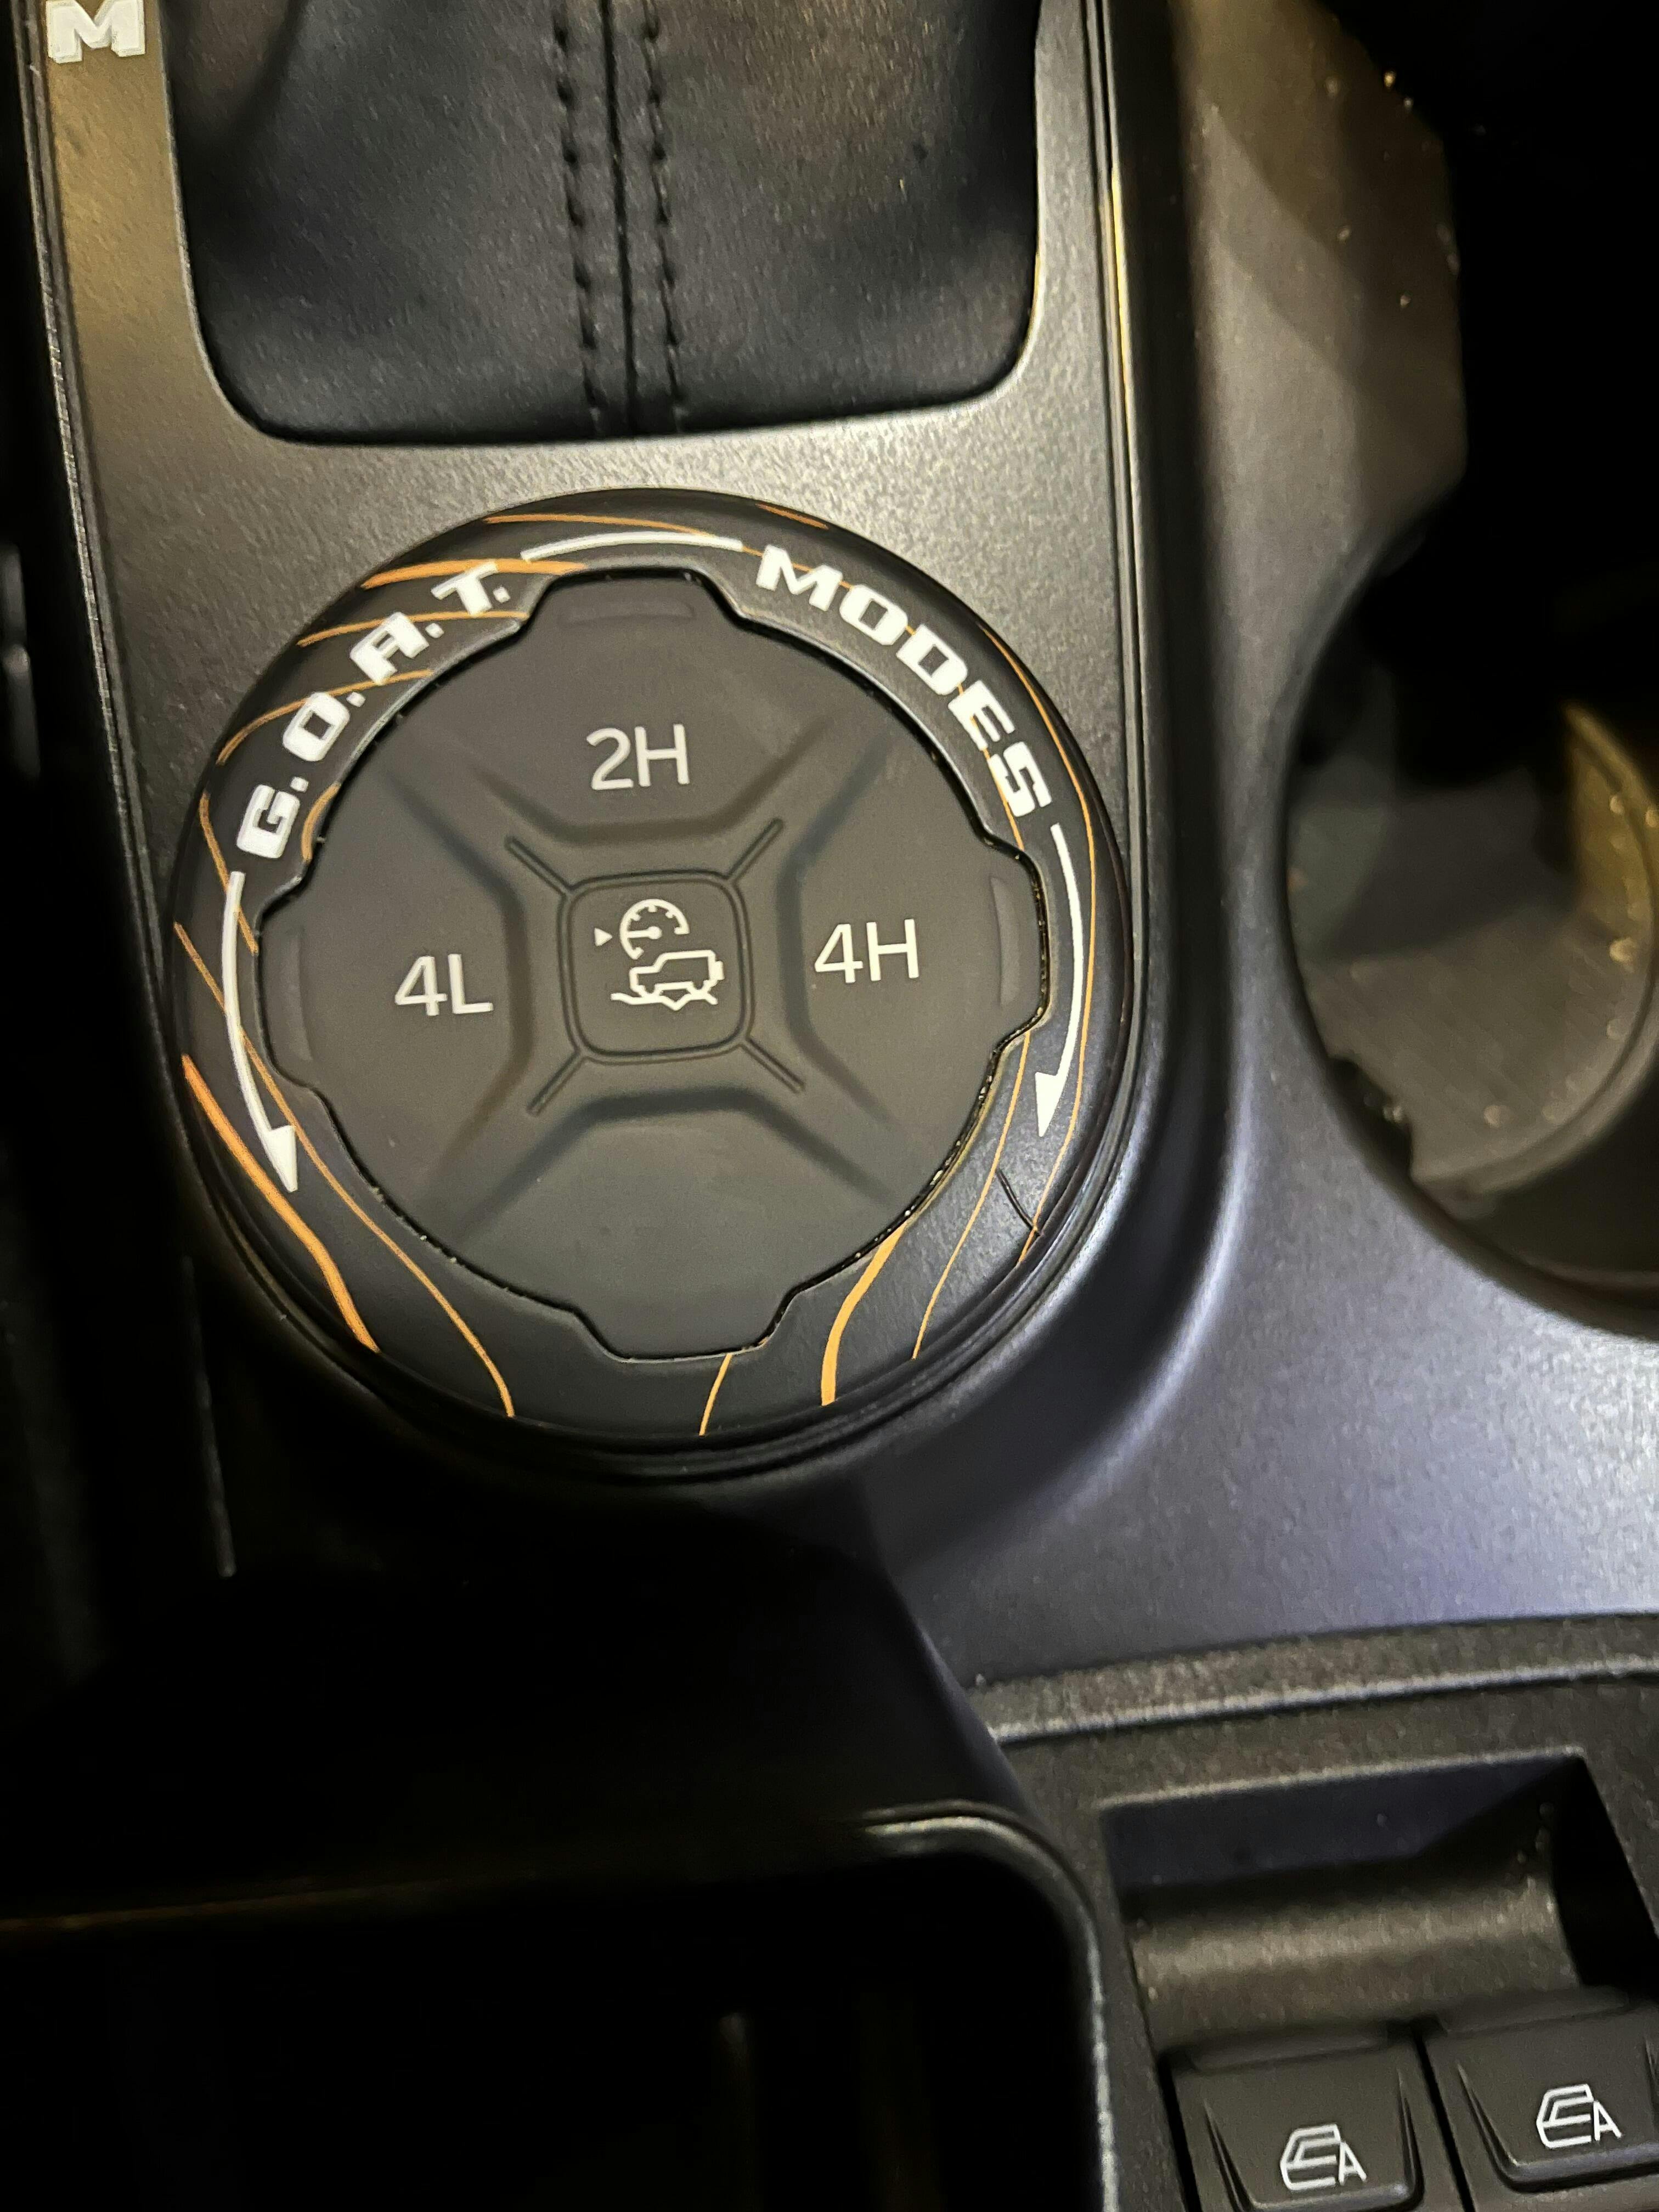
This overlay looks great inside all 6th Generation Ford Broncos. Upgrade your dull interior in a matter of minutes. Give your bland, plastic interior some character. At a normal viewing distance it truly looks like a custom modification.
Installation is easy. Just follow our video. Optional acrylic frame allows for easier mounting (we do not recommend using these frames with any aftermarket knobs).
Fits ALL Automatic Transmission 2021+ Broncos. Sold as a pair (1 extra)
Designs
Generic Topo - a nice topographic map style design
Badlands - actual location in Badlands National Park based on USGS maps
Bronco Knoll - the area including the coordinates marked on every Bronco. 34.5261 N, 116.75685 W.
Customization
While StickerFab caters to a large number of people, it is still possible to customize some orders. Ideas that have broad appeal are the best! However, if you have some art work, we may be able to do a special print just for you.
Military Themed
Patriotic
Other organizations
Please refrain from submitting trademarked content unless you have the rights to it. We are located in Fort Myers, FL if you are interested in helping us create custom templates for other vehicles or trim levels.
Make sure the install area and your hands are clean. Prep with alcohol pad if needed.
Use a wet install for this product. Loop the vinyl over the shifter and then start at centering up the GOAT mode hole. Gently align the rest of the vinyl. Once your alignment is proper, slowly and gently push out the liquid. Allow to dry and double check your install. You can use light heat to speed up the drying process. We do not recommend pushing the vinyl into the grooves.
Optional Acrylic Frame -
Clean the surface of the acrylic and use the same install described in the video. It will be easier to install on the frame than the actual shifter. This is still a wet install.
Do not stretch the material as you do not want it to change shape. The shape of the frame is a match to the overlay. Once you get the alignment correct, allow to dry.
Once dry, press the vinyl down once more.
Then move to the vehicle, clean the install area and test fit the frame. You will need to slip it over the shifter first and then move it towards the back. It will be mounted around the GOAT mode dial, so you want to test and make sure the placement doesn't prevent movement.
Once you have tested the install, remove the backing and re-install.
{"id":9299211649343,"title":"Acrylic Laser Series Automatic Shifter Frame - 2021+ Bronco Automatic","handle":"acrylic-laser-series-automatic-shifter-frame-2021-bronco","description":"\u003c!-- split --\u003e\n\u003cul\u003e\n \u003cli\u003eAcrylic\u003c\/li\u003e\n \u003cli\u003eDesigned for our automatic shifter overlays (\u003ca href=\"\/en-kw\/products\/topo-automatic-shifter-overlay-printed-series-2021-bronco-automatic\"\u003etopo\u003c\/a\u003e)\u003c\/li\u003e\n \u003cli\u003eInstalls with pre-applied 3M\u003c\/li\u003e\n\u003c\/ul\u003e\u003c!-- split --\u003e\u003c!-- splitnew --\u003e\n\u003ch2 style=\"text-align: center;\"\u003e2021+ Bronco Acrylic Laser Series Automatic Shifter Frame\u003c\/h2\u003e\n\u003cp\u003eThis shifter trim piece is designed to make your overlay install a bit easier. You can install our overlays on the frame and then mount the entire piece on to your shifter trim.\u003c\/p\u003e\n\u003cp\u003e\u003cstrong\u003eNOTE:\u003c\/strong\u003e We do not recommend using these frames with any aftermarket knobs. The height could conflict with those installs.\u003c\/p\u003e\n\u003ch3\u003eInstallation\u003c\/h3\u003e\n\u003cp\u003eTemperature 70-80 degrees. Clean the surface of the acrylic and use the same install described in the video (see overlay page). It will be easier to install on the frame than the actual shifter. This is still a wet install.\u003c\/p\u003e\n\u003cp\u003e\u003cspan style=\"font-size: 0.875rem;\"\u003eDo not stretch the material as you do not want it to change shape. The shape of the frame is a match to the overlay. Once you get the alignment correct, allow to dry.\u003c\/span\u003e\u003c\/p\u003e\n\u003cp\u003eOnce dry, press the vinyl down once more.\u003c\/p\u003e\n\u003cp\u003eThen move to the vehicle, clean the install area and test fit the frame. You will need to slip it over the shifter first and then move it towards the back. It will be mounted around the GOAT mode dial, so you want to test and make sure the placement doesn't prevent movement.\u003c\/p\u003e\n\u003cp\u003eOnce you have tested the install, remove the backing and re-install.\u003c\/p\u003e\n\u003cp\u003e\u003c\/p\u003e","published_at":"2024-04-10T12:31:32-04:00","created_at":"2024-04-10T12:21:33-04:00","vendor":"StickerFab","type":"Interior - Vinyl","tags":["2021 Bronco","do_not_show_new","Interior Trim and Knobs","Interior Vinyl","Underhood"],"price":999,"price_min":999,"price_max":999,"available":true,"price_varies":false,"compare_at_price":null,"compare_at_price_min":0,"compare_at_price_max":0,"compare_at_price_varies":false,"variants":[{"id":48290531344703,"title":"Default Title","option1":"Default Title","option2":null,"option3":null,"sku":"21BRONCOATSHIFT-LASER","requires_shipping":true,"taxable":true,"featured_image":null,"available":true,"name":"Acrylic Laser Series Automatic Shifter Frame - 2021+ Bronco Automatic","public_title":null,"options":["Default Title"],"price":999,"weight":57,"compare_at_price":null,"inventory_management":"shopify","barcode":null,"requires_selling_plan":false,"selling_plan_allocations":[]}],"images":["\/\/www.stickerfab.com\/cdn\/shop\/files\/DSC09835.jpg?v=1719160697"],"featured_image":"\/\/www.stickerfab.com\/cdn\/shop\/files\/DSC09835.jpg?v=1719160697","options":["Title"],"media":[{"alt":"Acrylic Laser Series Automatic Shifter Frame - 2021+ Bronco Automatic - StickerFab","id":37369558892863,"position":1,"preview_image":{"aspect_ratio":1.501,"height":853,"width":1280,"src":"\/\/www.stickerfab.com\/cdn\/shop\/files\/DSC09835.jpg?v=1719160697"},"aspect_ratio":1.501,"height":853,"media_type":"image","src":"\/\/www.stickerfab.com\/cdn\/shop\/files\/DSC09835.jpg?v=1719160697","width":1280}],"requires_selling_plan":false,"selling_plan_groups":[],"content":"\u003c!-- split --\u003e\n\u003cul\u003e\n \u003cli\u003eAcrylic\u003c\/li\u003e\n \u003cli\u003eDesigned for our automatic shifter overlays (\u003ca href=\"\/en-kw\/products\/topo-automatic-shifter-overlay-printed-series-2021-bronco-automatic\"\u003etopo\u003c\/a\u003e)\u003c\/li\u003e\n \u003cli\u003eInstalls with pre-applied 3M\u003c\/li\u003e\n\u003c\/ul\u003e\u003c!-- split --\u003e\u003c!-- splitnew --\u003e\n\u003ch2 style=\"text-align: center;\"\u003e2021+ Bronco Acrylic Laser Series Automatic Shifter Frame\u003c\/h2\u003e\n\u003cp\u003eThis shifter trim piece is designed to make your overlay install a bit easier. You can install our overlays on the frame and then mount the entire piece on to your shifter trim.\u003c\/p\u003e\n\u003cp\u003e\u003cstrong\u003eNOTE:\u003c\/strong\u003e We do not recommend using these frames with any aftermarket knobs. The height could conflict with those installs.\u003c\/p\u003e\n\u003ch3\u003eInstallation\u003c\/h3\u003e\n\u003cp\u003eTemperature 70-80 degrees. Clean the surface of the acrylic and use the same install described in the video (see overlay page). It will be easier to install on the frame than the actual shifter. This is still a wet install.\u003c\/p\u003e\n\u003cp\u003e\u003cspan style=\"font-size: 0.875rem;\"\u003eDo not stretch the material as you do not want it to change shape. The shape of the frame is a match to the overlay. Once you get the alignment correct, allow to dry.\u003c\/span\u003e\u003c\/p\u003e\n\u003cp\u003eOnce dry, press the vinyl down once more.\u003c\/p\u003e\n\u003cp\u003eThen move to the vehicle, clean the install area and test fit the frame. You will need to slip it over the shifter first and then move it towards the back. It will be mounted around the GOAT mode dial, so you want to test and make sure the placement doesn't prevent movement.\u003c\/p\u003e\n\u003cp\u003eOnce you have tested the install, remove the backing and re-install.\u003c\/p\u003e\n\u003cp\u003e\u003c\/p\u003e"}